Sunday, February 8, 2015

Sunday Sentiments: A Good Heart

Despite the layers of makeup or the clothes we wear, its important to not forget without a beautiful heart; it is all worthless. Having a good heart does not mean you have to be perfect, because none of us are. It just means you have to strive to be kind, compassionate, and loyal everyday. Don't let anyone with an ugly heart, let you feel less than you are.
xoxo, Maddie


Friday, February 6, 2015

Dorm Decor Series: DIY Glitter Monogram Pillow


   Today, I'm going to show you how to make your own personalized monogram pillow for $30.50!

This may sound expensive, but it is almost impossible to find a glitter monogram pillow! There are two or so that I found on Etsy, but you couldn't customize your glitter or pillow case cover. 
This similar pillow retails for around $50.00! And it is smaller!!
By using this tutorial, you can personalize the color and texture of the pillow and the color of the monogram! It will only take you about 30 mins to make.


You'll need:
an Iron/Ironing Board
a 12 inch Iron-on Glitter Monogram-the one I purchased is from Etsy HERE -$14.50
a pillow case-Mine is 18x18 in Hot Pink from Amazon HERE -$15.99

How-to:
1. Take the pillow insert out.
2. Heat up your iron to 320 degrees Fahrenheit (it should be just above the cotton setting).
3. Iron the surface of the pillow case before you place the monogram on it.
4. Take the protective wax paper off of the sticky side of the iron-on monogram.
5. Place the monogram in the center of the pillow.
6. Take the protective parchment paper and put it over the plastic.
7. Once the iron heats up, place the iron over the monogram for about 10-20 seconds.
8. Peel the plastic and wax paper off slowly, if the glitter monogram comes up--repeat process and iron again until it sticks.
9. Once it sticks, pull off the plastic and wax paper and you'll have your wonderful personalized monogram pillow!


 The Final Product!


10 Valentines Day Gifts under $50


With Valentine's Day coming up in less than 10 days, I thought it would be appropriate to do a "10 VDAY Gifts under $50" gift guide. I think almost every girl would love at least one of these gifts, but I love all of them and know all my friends would too! Hopefully this gift guide helps! All these products are linked below!

1. Kendra Scott Skylette Turquoise Glass Stud Earrings - Turquoise- $50
2. Victoria's Secret Pink Boyfriend Jersey-$39.95
3. Dogearred Pearl Necklace- $50
4. Kate Spade "LOVE" phone case-ON SALE- $31.15
5. Lush Valentines gift set- $39.95
6. Netflix giftcard-$30
7. Godiva Box of Chocolates (8 piece)- $15
8. Buxom Lipgloss-$19
9. Tory Burch Cosmetic Case- $38
10. Burberry Brit Perfume 1.7oz- $29.59

xoxo, Maddie

Thursday, February 5, 2015

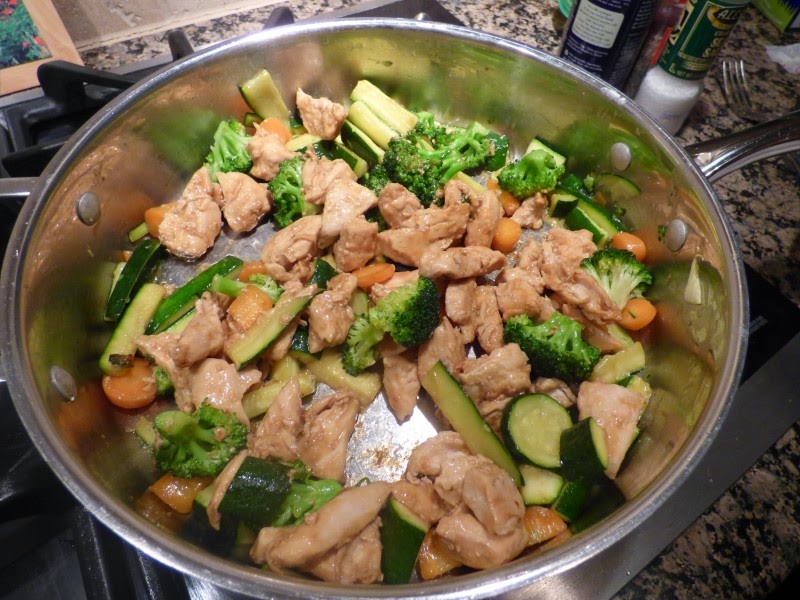
Healthy Snacks: Teriyaki Chicken Stir Fry


Now this is not technically a "snack", but it is a healthy and delicious dinner that I couldn't help but share! 
Ingredients you'll need:

Teriyaki Sauce 
Chicken
Zucchini
Broccoli
Carrots
Rice
Butter
Olive Oil

How to:
1. Chop the zucchini, carrots, and broccoli up and sauté it in olive oil.
2. 1 -1.5 lbs of Boneless Skinless Chicken Breast
3. Stir in the teriyaki sauce with the chicken
4. Mix the vegetables into the teriyaki chicken
5. Cook a cup of rice-- follow the instructions on the bag/box
6. Add butter to the rice (optional)
7. Place stir fry on top of the rice! and voila---you've got a delicious stir fry!


Healthy Snacks: Mini Zucchini Pizza Bites

 Mini Zucchini Pizza Bites:
Ingredients You'll Need:

Salt and Pepper
1 tablespoon of Olive Oil
3 Zucchini
Shredded Mozzarella Cheese
Marinara Sauce

1. I washed the zucchini and cut it into slices.
2. I sautéed the zucchini in a frying pan with 2 tablespoons of olive oil
3. I moved the sautéed zucchini slices to my pan and put salt and pepper on them.
4. I then put marinara sauce and mozzarella cheese on them.
5. I set the oven on Broil and baked them for 1-2 minutes.
6. Voila! Your zucchini "pizza" bites are done!

Pictures of the zucchini bites in the making!(below)


These may not look like the prettiest haha, but they were absolutely delicious. These are much healthier than high fat/calorie frozen pizza bites/bagels! These would also work for a great party appetizer.

 xoxo, Maddie


Wednesday, February 4, 2015

My Top 5 Beauty Tips

I wanted to keep this semi-original and unique, because for years I've seen articles like "50 Beauty Tricks No One Told You" and I'd go read through them and I either already did their "secret tips and tricks" or no way was I gonna use a plastic spoon to help me put on mascara on my bottom lashes. The things I am about to share are by no means original, but they are either products or techniques that I have found that work.

1. The Wet Brush- If only my mom had this, when I was a little girl! Even though it is perfect for kids, its great for adults as well. If you have easily tangled hair, this brush glides through it with ease and DOESN'T HURT AT ALL. You can use it on wet or dry hair. I've gone through about 4 of these brushes (not because they don't last, but because I periodically I buy new brushes to prevent buildup).

2. St. Tropez Tanning Mousse- If you are pale, this is THE PERFECT TANNER. I will never try another tanner and I'll never be orange and smell like tanner ever again, because of this tanner. It is a true brown shade...you can be as pale as a ghost and this looks amazing on you. It is applied with a mitt, which can be purchased in beauty stores or online. By using the mitt, the application is flawless (I rarely get streaks and never hand marks). If you are darker, they sell a darker shade of mousse HERE

3. Post-It Flags- My favorite!! I use these for creating a straight cat eye. I tried the "tape trick" where you put tape from the outer corner of your eye to the outer tip of your eyebrow, but I found that tape pulled on my skin too much, because tape is meant to stay and stick, once it is put on. Post-It flags on the other hand are removable. These can be found at your local drugstore, office supply store, or supermarket. 

4. Black Eyeshadow- I always set my gel, pencil, or liquid liner on my upper lid in black eyeshadow. I feel it intensifies the eyeliner and makes sure it doesn't smudge and lasts all day. I've been doing this for years and I love it!

5. Brushes- The right makeup brushes can get you far in life. My two must-have brushes are both from Sephora. I could not live without the Sephora Foundation Buffing Brush or the Sephora Fan Brush. I always use the Buffing Brush on my foundation. The worst makeup mistake I've seen is foundation lines. I'm just screaming inside, "Girl, you HAVE to buff it out!". It is such an easy problem to fix with this brush. The Fan Brush is perfect for powder over liquid foundation/concealer. The fan brush applies the powder lightly so you don't get a cake face or look overly powdered.

Tuesday, February 3, 2015

Daily Smokey Eye Makeup


I wear eye makeup almost everyday-(for some people that sounds crazy, but I love makeup and I just feel confident with it on..so why not?)! If I only have about 5-6 minutes to do my eye makeup this is my go-to look! Its easy and looks gorgeous! 

My version of a wearable brown smokey eye includes these following steps:
1. I start with Urban Decay Anti-Aging Eye Primer Potion-I find that the "Anti-Aging" version is much creamier than the regular.

2. I apply Maybelline Color Tattoo in Bad to the Bronze all over my lid (not into the crease)- this is my FAVORITE!

3. I use my Elf eyeshadow brush and Naked 2 Palette to apply the color Suspect (similar to Bad to the Bronze) all over the lid.

4. I use my Elf contouring brush and Naked 2 Palette to apply the color Snakebite (a darker brown) into the crease.

5. Not pictured, but I recommend using a blending brush to blend the crease color out. This creates the smokey look. I own one by Sonia Kashuk--here.

6. Eyeliners: I use the Kat Von D Tattoo Liner for my upper lid. I create a subtle wing. Then for my upper and lower water lines I use L'Oreal Voluminous Smoldering Eyeliner (its another favorite of mine)!

7. I finish the look with my L'Oreal Voluminous Mascara!

I've linked all of the products so if you click on the names of the products, it will take you to the site to purchase the product!

xoxo, Maddie